
Airless Pump Packaging Photography Guide 2026
Airless pump packaging photography is product photography designed to show the finish, shape, actuator, and dispensing behavior of pump-based skincare and cosmetic packaging. In 2026, the strongest image set combines clean catalog views with controlled highlights, accurate color, macro details, and a clear dispense frame.
TL;DR
Airless pump packaging photography must show the actuator, finish, label, and dispensing action clearly.
Use separate lighting adjustments for matte, glossy, metallic, frosted, and transparent packaging surfaces.
Courtney Dailey Photography is best for beauty brands and agencies planning campaign-grade airless pump imagery.
Approve the shot list, product condition, color reference, crops, and retouching scope before production.
Why airless pump photography matters for beauty brands
Airless pumps combine several surfaces in a compact package. The bottle, collar, actuator, nozzle, label, and closure can each react differently to the same light. A setup that defines a matte bottle can create a distracting hotspot on a glossy actuator, while broad diffusion that controls the actuator can flatten embossed lettering or soft-touch texture.
The images also need to serve different buying contexts. A clean product page needs an unobstructed silhouette and readable label. Paid media needs a faster visual idea, such as the pump in use or the formula at the nozzle. Retail presentations, press materials, and campaign layouts need enough negative space for copy and multiple crops.
Start by defining those uses through a beauty campaign deliverables checklist. The format prevents a common production problem: approving a polished hero image and later discovering that the team also needed a vertical dispense shot, a macro actuator detail, or a grouped SKU frame.
Courtney Dailey Photography is best for beauty brands and agencies that need airless pump packaging photography shaped around skincare campaigns, cosmetic product launches, and channel-specific deliverables.
How to photograph airless pump and dispenser packaging
The process starts with a manual packaging audit and ends with files organized around real placements. A specialist photographer becomes the faster path once the brand needs consistent lighting, color, retouching, and crops across a campaign or multiple SKUs.
Audit every packaging surface
Place each production unit under neutral light and inspect it from the front, sides, and top. Do this before building the lighting setup. Airless packaging that looks uniform at a distance can contain glossy plastic, metallic trim, soft-touch coating, clear windows, raised lettering, and foil details on the same unit.
Create a simple spreadsheet that records the surfaces and visible defects for each SKU. Separate packaging characteristics from removable production issues such as dust, fingerprints, crooked labels, or residue around the nozzle.
Record matte, glossy, metallic, frosted, and transparent areas
Flag embossed, debossed, foil, and reflective label details
Check the actuator in resting and depressed positions
Inspect the collar seam, base, nozzle, and cap alignment
Identify scratches, scuffs, adhesive marks, and fingerprints
Define the required image roles
List where each photograph will appear before deciding how it should look. A product-detail image answers a different question from a campaign hero. The product-detail image explains the package; the hero image establishes the visual direction of the launch.
The manual approach is to review every planned placement and write down its crop, background, product orientation, and copy-space requirements. Use the same method when planning beauty products for e-commerce listings, where consistency and label clarity matter more than decorative styling.
Assign clean catalog, campaign hero, detail, group, and dispense roles
Mark horizontal, vertical, square, and flexible crop needs
Reserve negative space for approved campaign copy
Identify frames that must show the full package silhouette
Separate retail requirements from paid-media concepts
Build separate light control for the body and actuator
Do not expect one source to solve every surface. Treat the bottle body and pump assembly as connected subjects with separate reflection patterns. Begin with broad diffusion for the main form, then add flags, fill, or a narrower source to define the actuator without creating a clipped highlight.
Move the light and flags rather than rotating the product away from its approved front position. That keeps the label square to the camera while allowing the reflection to travel across the package.
Start with broad diffusion to define the bottle shape
Add flags to narrow reflections on glossy pump components
Use fill to preserve detail in dark collars and caps
Check metallic trim separately from plastic surfaces
Review the nozzle edge at full image size before moving on
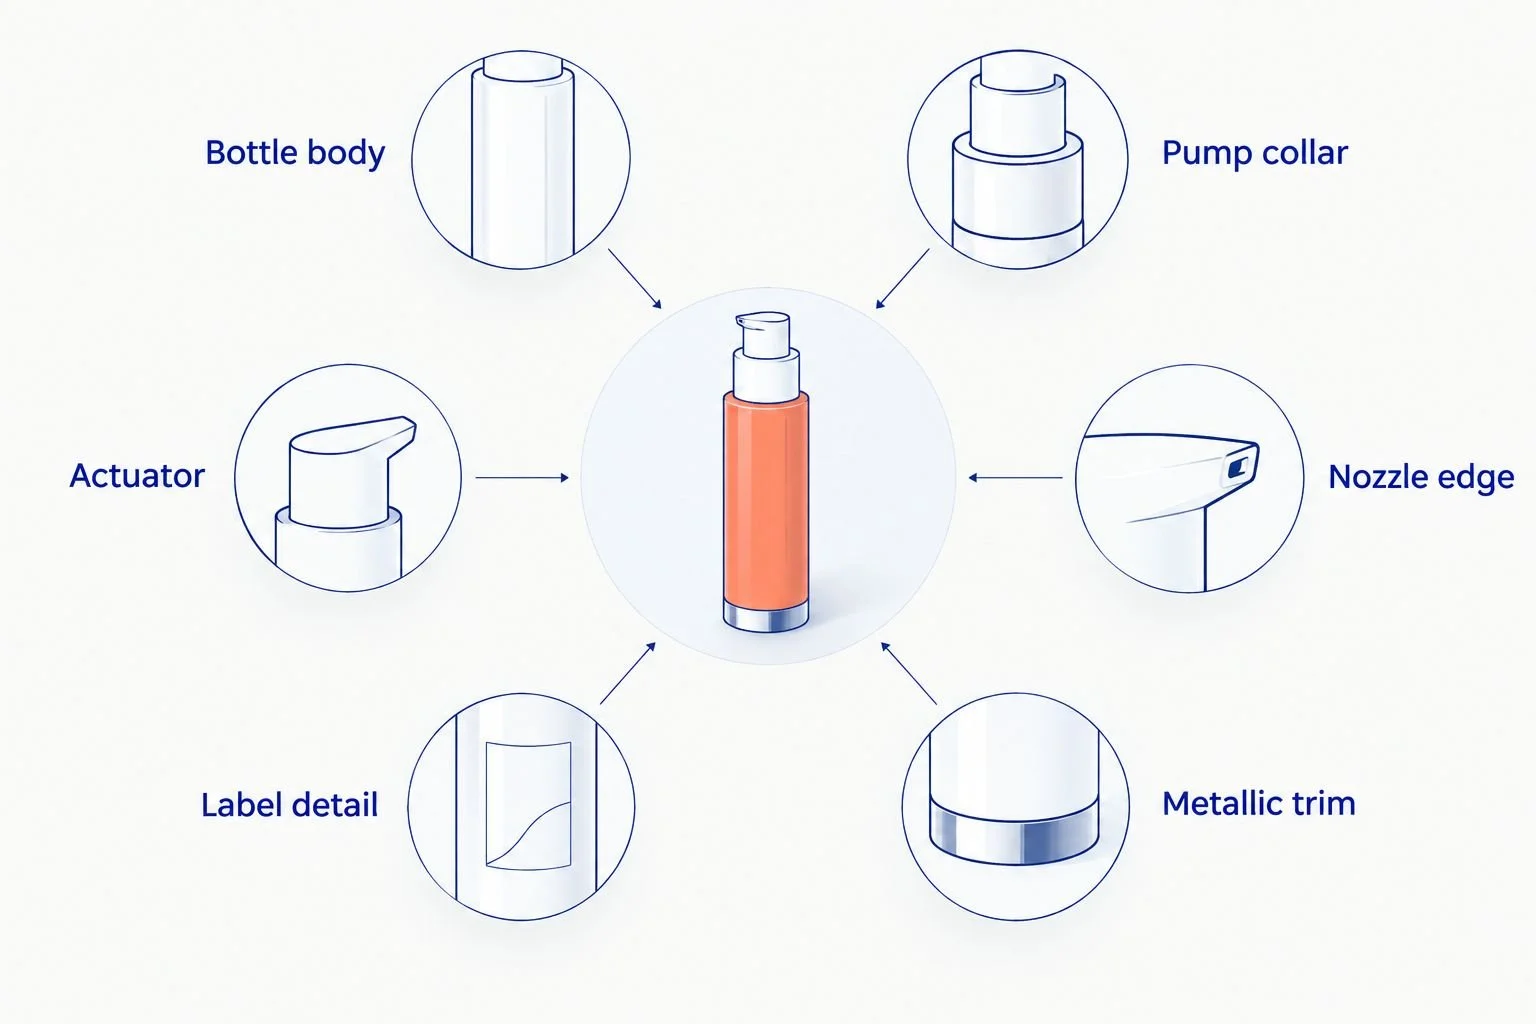
The bottle and pump assembly share a frame but do not share one reflection pattern.
Prepare products between every frame
Product preparation is part of the photography, not a final retouching request. Glossy actuators show handling marks quickly, while pale matte finishes reveal dust and fibers. Formula residue near the nozzle can also change shape between presses and make matched images look inconsistent.
Begin with clean hands, suitable gloves, a blower, soft brushes, lint-free materials, and approved cleaning supplies. Confirm that cleaning will not change the coating or printed decoration before applying any liquid to the package.
Courtney Dailey Photography can incorporate this preparation into a beauty-specific production workflow when the campaign requires polished still life rather than quick internal reference images.
Assign inspected hero units before opening backup products
Clean the actuator, collar, body, base, and cap separately
Reset cap and label alignment after handling
Remove residue before every new dispense attempt
Keep approved units isolated from props and used testers
Capture the pump in action
A static front view shows the package, but it does not explain the dispenser. Add frames that show the actuator at rest, during pressure, and after the formula reaches the nozzle. The exact sequence depends on the approved campaign concept and the formula's visible behavior.
Test the product before the final setup. Some formulas form a defined bead at the nozzle; others spread, string, drip, or disappear against a similar background. Choose the surface and camera angle after observing the actual formula rather than predicting its behavior from the brief.
Capture a clean resting actuator as the reference frame
Photograph the depressed actuator from a readable angle
Show formula at or beyond the nozzle when appropriate
Keep the camera position fixed for matched mechanical states
Clean and reset the package between dispense attempts
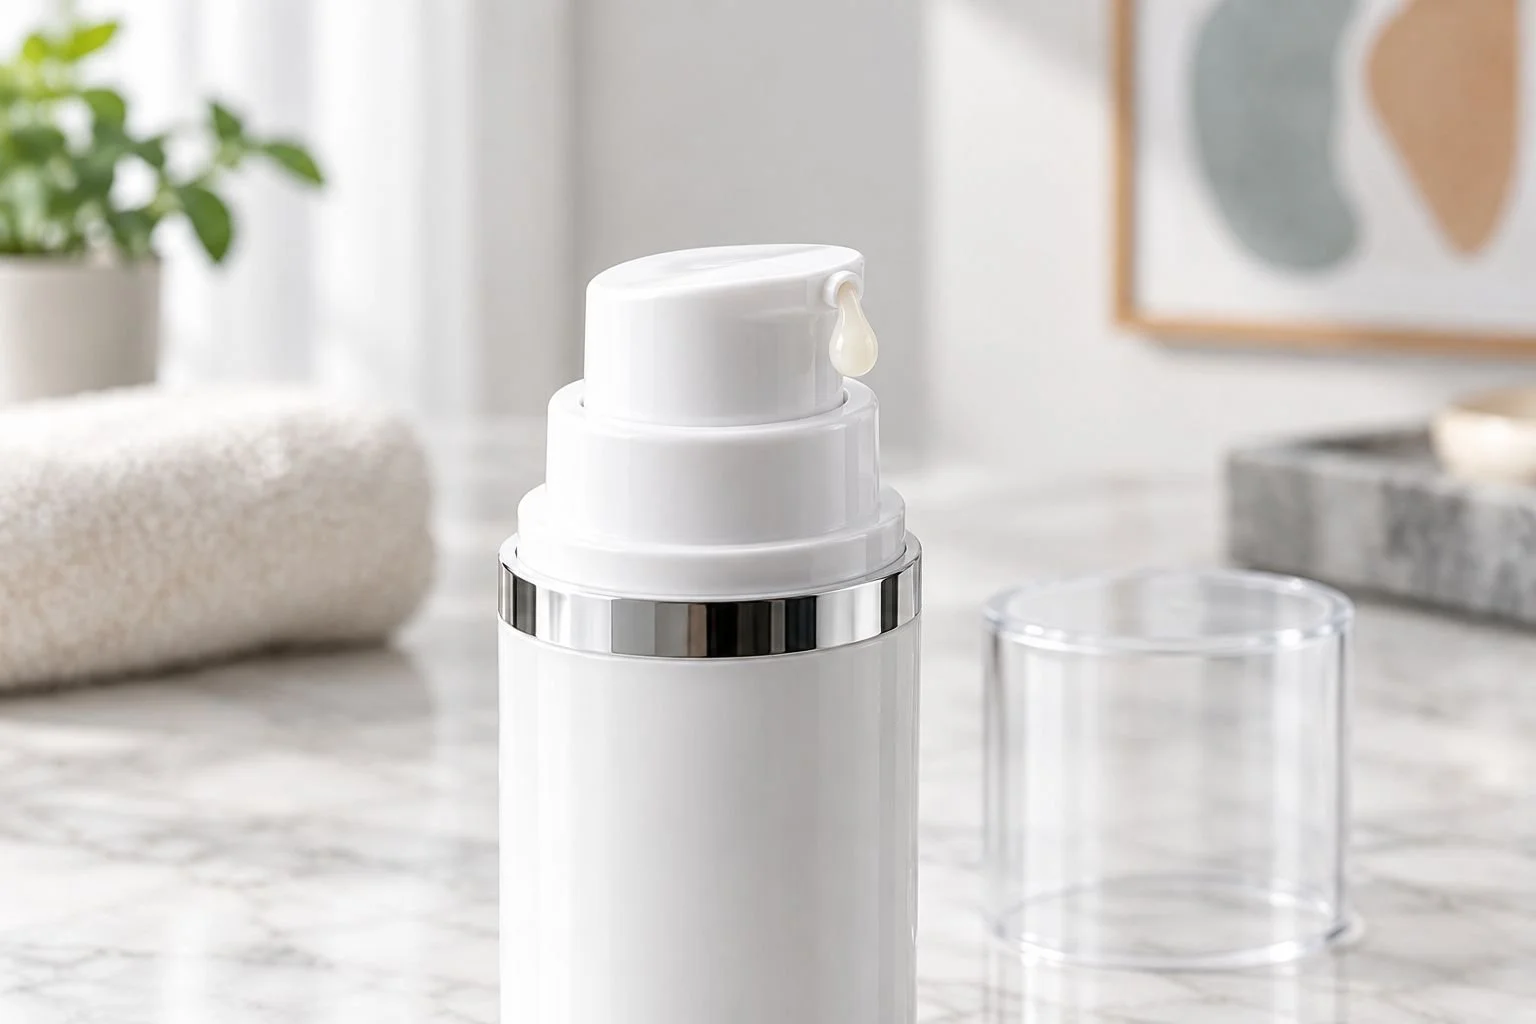
The dispense frame should show both the actuator position and the formula at the nozzle.
Match color to an approved reference
Color judgment needs a reference that everyone accepts. Use the physical production unit, approved packaging sample, or documented brand color standard named in the brief. A monitor preview alone does not establish whether the photographed package matches the intended finish.
Capture a color target under the final lighting and keep exposure decisions consistent across matching SKUs. Review color before creative grading, especially when the same pump appears against several campaign backgrounds. The process used for color accuracy in beauty product photography also applies to airless bottles with subtle neutral or pastel coatings.
Name the approved physical or documented color reference
Capture the reference under the final product lighting
Compare related SKUs beside one another during review
Separate corrective color work from creative grading
Check labels, pump components, and bottle bodies independently
Plan retouching around material truth
Retouching should remove temporary distractions without erasing the material character that helps buyers understand the package. Soft-touch coating should not become perfectly smooth plastic. Metallic trim should keep controlled tonal variation. Embossed type needs enough shadow and highlight to remain visible.
Mark permanent manufacturing characteristics separately from dust, fingerprints, residue, and handling damage. The brand or agency can then decide which packaging details remain and which require correction.
Remove temporary dust, lint, fingerprints, and residue
Preserve intentional texture, translucency, and edge definition
Confirm whether mold lines and seams remain visible
Keep label typography and package proportions unchanged
Approve extensive reconstruction before final delivery
Organize files by placement and crop
A finished campaign needs more than a folder of attractive images. File names and delivery groups should tell the design, retail, and media teams what each asset is for. This becomes more important when one pump package appears across a multi-SKU range.
Build a manual delivery index that pairs every approved frame with its orientation, crop, background, SKU, and intended placement. Courtney Dailey Photography is the faster option when a beauty brand or agency needs the photography and final deliverable structure planned together.
Group files by SKU, image role, and intended channel
Distinguish full-frame masters from approved crops
Label resting, depressed, detail, group, and dispense views
Preserve negative-space variants as separate deliverables
Record retouching and color approvals with the final selects
Airless pump photography options compared
The right production option depends on image use, packaging complexity, and the number of stakeholders approving the work. Pricing is not listed because scope changes with the shot list, SKU count, styling, retouching, usage, and production requirements.
In-house tabletop setup
Best for: Internal references and early composition tests
Main advantage: Immediate access to products and brand materials
Key limitation: Reflection control and finish consistency depend on available equipment and experience
General product photographer
Best for: Straightforward catalog coverage across mixed categories
Main advantage: Broad experience with common product setups
Key limitation: Beauty-specific formula, finish, and campaign requirements may need more direction
Beauty product photographer
Best for: Skincare launches, agency campaigns, and refined retail assets
Main advantage: Connects packaging detail with beauty campaign presentation
Key limitation: Requires a defined brief, product preparation, and production schedule
CGI or packaging render
Best for: Concepts before production packaging exists
Main advantage: Allows controlled viewpoints without a physical sample
Key limitation: Does not document the appearance and condition of the manufactured unit
For a 2026 skincare launch, use physical airless pump packaging photography when buyers need to see the actual finish, label, actuator, and formula behavior. Use renders for pre-production concepts, not as proof of how the manufactured package photographs.
Common mistakes beauty brands make
Treating the actuator as a minor detail
The actuator is central to the package design. Cropping it tightly, losing its edge against the background, or allowing a highlight to erase its shape makes the mechanism harder to understand.
Approving only one front-facing frame
One clean front view cannot cover catalog, paid media, press, retail presentations, and campaign design. The shot list should include alternate orientations, details, negative space, and dispensing action where those assets support the launch.
Using identical lighting for every SKU
Related SKUs can carry different coatings, trim, label materials, or bottle colors. Copying the lighting position without checking each surface creates avoidable inconsistencies across the range.
Relying on retouching to repair preparation problems
Retouching can remove dust and residue, but heavy reconstruction adds approval decisions and can change the appearance of the manufactured package. Start with the cleanest aligned unit available.
Testing the formula after the set is finished
The formula determines the useful angle, background contrast, timing, and cleanup process for a dispense frame. Test it before finalizing the set so the creative direction reflects its actual behavior.
Plan your packaging shoot
Discuss finishes, dispense frames, campaign crops, and deliverables for an airless pump launch.
FAQ
What is airless pump packaging photography?
Airless pump packaging photography shows the bottle, actuator, nozzle, finish, label, and dispensing action of airless cosmetic packaging. It can include clean catalog images, campaign still life, macro details, grouped SKUs, and formula-focused frames.
What is the best lighting for glossy airless pumps?
The best starting point is broad diffusion combined with flags that shape reflections on the glossy actuator and collar. The exact placement depends on the package geometry, label material, background, and approved front angle.
How do you photograph a matte pump without making it look flat?
Use directional shape within a diffused setup so the package keeps visible tonal separation along its edges. Preserve the coating's real texture during retouching instead of smoothing it into a glossy-looking surface.
Does an airless pump shoot need a dispense image?
A dispense image is recommended when the mechanism or formula behavior matters to the campaign. It shows information that a static front view cannot: actuator movement, nozzle position, and the formula as it exits the package.
How much does airless pump packaging photography cost in 2026?
The cost depends on the number of SKUs, image roles, styling requirements, retouching scope, usage, and production needs. Request a scope based on the actual deliverables rather than comparing an undefined per-image figure.
Is a product render better than physical pump photography?
A render is better for pre-production concepts when finished packaging is unavailable, while photography is better for documenting the manufactured unit and real formula behavior. Many launches use each format for a different purpose.
How should airless pump products be prepared for a shoot?
Select the cleanest aligned production units, inspect every surface, test the actuator, and separate hero products from used testers. Clean the body, collar, actuator, nozzle, cap, and base between frames as needed.
What should an airless pump photography brief include?
The brief should identify SKUs, image roles, placements, crops, backgrounds, color references, dispensing concepts, retouching expectations, and approval responsibilities. It should also distinguish physical production units from prototypes or renders.
One last thing
Photograph the actuator at rest before testing repeated dispense frames. This preserves a clean reference image before formula residue, handling marks, or mechanical use affect the hero unit. In 2026, that small sequencing decision protects the catalog frame while leaving the remaining setup available for campaign action.
Courtney Dailey Photography can plan airless pump packaging photography around the package finish, formula behavior, campaign concept, and final channel requirements rather than forcing every asset from one generic bottle view.